Vegan Kimchi
Homemade kimchi has become one of my favourite foods! When I was pregnant with Beanie, I had a lowkey obsession with kimchi, and when I got home from the hospital, kimchi was the first thing I wanted to make!Since I've made the kimchi a few more times, I've tweaked my recipe from my original YouTube video. I toned down the vegan fish sauce, garlic and gochugaru content, and changed up the vegetables. I've also used a can of Korean pear juice instead of using a fresh Korean pear because it's more convenient.
Ingredients
For salting the cabbage
- 1 large head of napa cabbage 2.5kg
- 1/4 coarse kosher salt
For the spice mixture
- 1 can Korean pear juice 238 mL, or alternatively, blend 1 Korean pear with 1/2 cup water
- 2 tbsp sweet rice flour glutinous rice flour
- 3/4 cup gochugaru Korean red pepper flakes
- 1/2 head of garlic ~6 cloves, peeled and minced
- 1/2 inch ginger grated (~1-2 tsp of ginger)
- 1/3 cup vegan fish sauce you can substitute kelp powder, but add 1/3 cup water to sweet rice flour paste
Vegetables
- 1.5-2 cups Korean radish I used 4 inches of daikon peeled and julienned
- 2 medium carrots peeled and julienned
- 1-1.5 cups of flat chives cut into 1 inch pieces (you can also use green onions if you don't have flat chives)
Instructions
- Salting the Cabbage
- Cut the cabbage into halves by slicing through the bottom white part of the cabbage (like the bottom half of the cabbage), then pull to split apart the leaves.
- Cut the halves into quarters by using the same method. You can choose too ferment your kimchi in quarters like this, but now I chop into 1 inch pieces because it's faster and easier to eat.
- Give the cabbage a quick rinse, ensuring the leaves are dampened for the salt to stick to the leaves.
- If making as quartered cabbage, layer about 1/2 tsp of salt in between each layer of leaves, focusing mostly on the whites of the cabbage. When I cut up all the cabbage, it uses less salt overall, so now I just sprinkle 2-3 tbsp of pickling or kosher salt onto the cabbage, and mix well to coat.
- Place in a large bowl to brine and release the moisture content for 2 hours, rotating the pieces every 30 minutes to ensure they are evenly brined. Meanwhile, prepare the vegetables and spice mixture.
- For the spice mixture
- In a pot, combine water and sweet rice flour and cook over medium heat, stirring constantly. If you're using kelp powder instead of vegan fish sauce, add another 1/3 cup of water to this mixture. Cook until it bubbles for at least a minute.
- Transfer to a large clean bowl (to accommodate the remaining spices) and allow to cool (prepare the vegetables during this time)
- To the bowl of glutinous rice flour mixture, add gochugaru flakes, 1/2 head of garlic, minced, grated ginger, vegan fish sauce, and blended Korean pear (it is kind of the shape of an apple). Mix until incorporated. If you're using kelp powder, add it and 1 tbsp of kosher salt here.
To prepare the kimchi:
- Once your cabbage is fully wilted in the salty brine water, pour out the brine and rinse the cabbage well. You can trim the inner core of the cabbage here to separate the leaves, or you can leave it intact if you're fermenting the kimchi in a flat container. Cut your cabbage as preferred (see note)
- Rinse well with cold water and then drain well, squeezing out as much extra moisture as you can.
- Combine the spice mixture and all the cut vegetables with the cabbage and mix until everything is evenly coated in the spice mixture.
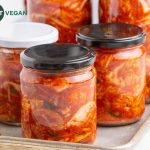
- Transfer to sanitized jars or containers.
- Press down the mixture well and leave about 1/2 inch to 1 inch of space at the top. Cover loosely with lid (don't screw tightly), and let ferment on the counter for 1-2 days (1 day if it is quite warm in your kitchen, 2-3 days if it's cooler).
During fermentation:
- Store your jars of kimchi on a tray to catch any liquid that bubbles over. "Burp" your jars by opening the jars to release the gases. You can also use a clean spoon to press down the kimchi to release the extra gases. I'm not sure if this is actual science, but I feel like eliminating the air pockets will make the kimchi last longer too.
- After each day, open a jar and smell to see how it's fermenting. If it's quite warm, it might be ready within a day. If it's cooler (currently 19-22C in my kitchen), so it took two days.
- It's ready when it tastes tangy and smells slightly tart. Tighten the jars and store in the fridge! The kimchi continues to ferment over time, but as long as you use clean utensils whenever you use any from the jar, it should last for a long time! If your kimchi gets very sour, it may cause indigestion, so use sour kimchi for well-cooked dishes like kimchi stew or kimchi fried rice (where you fry the kimchi very well first).
Notes
I was fermenting in jars, so I trimmed the inner core and then cut the leaves so they were only 1 inch wide (same method as quartering, cutting through the white then pulling to tear the leaf). You could also chop them into 1.5 inch square pieces so they pack more compactly into jars.