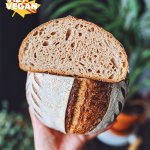
Vegan Sourdough Bread For Beginners
This is my version of vegan sourdough bread for beginners, using a similar methodology as Kristin from Full Proof Baking!
Ingredients
Levain:
- 15 g mature starter
- 30 g bread flour I tend to do 20 g bread flour, 10 g my regular starter flour mix
- 30 g water
Autolyse:
- 250 g strong bread flour you can use AP, just hold back 10 g water
- 20 g vital wheat gluten you can sub bread flour for this, but if you're using AP, the added VWG makes your bread much better
- 80 g spelt flour you can substitute whole wheat or rye, or a mix of the 3, as long as it is the same weight
- 280 g water you can hold 20 g, and add as needed in case you aren't experienced with high hydration doughs
- 8 g kosher salt
To bake
- Rice flour for dusting your proofing basket
- A bread lame or a safety blade, or a very sharp knife to score the top
- A large dutch oven lined with parchment paper or a cast iron pan and a baking dish of water
Instructions
- Directions:
9:00 AM - Start your levain by combining mature starter, flour, and water. Combine well, mark with a rubber band/tape and let ferment in a warm place to activate for about 5-6 hours (depending on the strength of your starter). It should be at least doubled and just about to fall by the 6 hr mark.
12:00 PM - Begin autolyse process by combining bread flour, vital wheat gluten, spelt flour/whole wheat. Mix well before adding water to evenly distribute ingredients. Add 260 g water, mix and if you are finding you want to up the hydration, add the remaining 20 g water. You should have a very sticky and rough mixture. Scrape down the sides, cover with a plate and let rest until your levain is ready.
2:30-3 PM: Your levain should be at least doubled in size. Add to your autolysed dough and mix until incorporated, this should take around 3-4 minutes to mix in. It won't seem like it'll incorporate at first but keep mixing until the dough is even and sticky again. Cover and let rest for 30 min.
3:30 PM: Add 8 g kosher salt and knead into the dough until well incorporated. Cover and let rest for another 30 minutes.
4:00 PM: At this point, you'll need to work the gluten gently to encourage strength but also allow for the starter to leaven the dough. You can either perform stretch and folds OR perform a light envelope fold to prepare your dough for coil folds.
To do one set of stretch and folds: With wet hands, scoop your hand under one side of the dough, gently pull it up until just before it looks like it'll resist and tear (about 4-6 inches), then fold it over the center. Turn 90 degrees, and repeat the movement, and repeat this stretch and fold until you've done all 4 sides. Cover and let rest for 45 minutes.
OR
To do coil folds: Prep the dough with an envelope fold - So turn your dough out onto a clean, wet surface. With wet hands, gently pull the top side of the dough slightly up, then forwards to fold over the middle. Pat down gently to "seal". Then grab the right side of the dough, and pull gently up and towards the middle. Repeat with the left side, and then bottom and pull upwards. Use a bench scraper to transfer to a flat, 2 inch deep dish (like a casserole dish or a pyrex dish) then cover and let rest for 30 minutes.
Once it rests for 30 minutes, with wet hands, tuck hands underneath the middle of the dough, and gently pull up from the top. The top of the dough will want to naturally tuck underneath the dough, you may need to tuck and pull another time from the top if the dough is still quite slack. Turn the dish 180 degrees, then repeat this coil fold on the bottom side (which is now the top). Turn 90 degrees, repeat this fold (you may need to rewet your hands so they dont stick). Turn 180 degrees and repeat with the final side. Let rest for 45 minutes.
4:00-7:00 PM: This window of time should be divided into 30-45 min intervals of stretch and folds OR coil folds. Both work fine, coil folds are a little more gentle and may yield a more open crumb structure in the final bake. I generally like to perform at least 3 sets of folds, as long as you let the dough rest for 30 min in between each fold. Then I like to let the dough continue fermenting for a final 45-60 minutes. Your dough should be a little poofier than when you started your stretch and folds (generally between 50-70% bigger). You'll know your dough is ready when after resting 30 minutes from your coil fold, it still keeps most of it's shape (aka it won't have splooted out into a wet puddle like when you started).
8:00 PM: Now you preshape - Lightly flour your surface and flip your dish overtop, allowing the dough to slowly release itself from its vessel. Perform a gentle envelope fold (top, side, side, bottom), then use a bench scraper to flip the dough, seam side down. Gently shape by pushing the bench scraper in a backwards C motion and pull the dough towards you in a C. You'll gently rotate the dough with this motion a few times to create a but of surface tension in the dough. Let rest for 15 minutes.
While your dough rests, prep your proofing container. If you have a banneton, use either brown rice or white rice flour to dust the inside so it won't stick to your dough. If you don't have a banneton, you can use a loaf pan lined with a lint-free tea towel, dusted well with rice flour. Regular flour will not be as effective as rice flour, I highly recommend rice flour. Set aside.
8:15 PM: Use your bench scraper to scoop under the dough and flip onto a lightly floured surface. With lightly floured fingers, gently fold the top over into the middle, and tap lightly to seal. Gently pull the bottom to fold over the folded top. Tap lightly to seal. Turn 90 degrees, then tuck your thumbs into the top 2 inches of the dough, and use the rest of your fingers to tuck and rough the down gently and firmly towards you (kind of like a sleeping bag).
With seams down, close the two short ends by pinching the edges together. Then, use your bench scraper to gently push the dough and tuck the seams underneath to try to create surface tension. Use the bench scraper to scoop the dough into your hands (or flip over), then place the dough into your rice-floured banneton or loaf pan, seams up. You can lightly "stitch" the dough if you find it kind of unraveled (pulling the dough over each other left to right in a zig-zag pattern).
Dust extra rice flour along the edges and partially At this point, if you poke your dough (poke a floured part), it should spring back but leave a slight dent. If it springs back and doesn't leave a dent, let it sit, covered with a plastic bag or clean shower cap (avoid letting it touch the top) for another 15-20 minutes until it springs back. Careful not to let it overproof: when it's overproofed, it doesn't spring back at all and just stays dented if you poke it.
The "bulk ferment" begins when you add your levain and ends when you cover the dough to put in the fridge, and typically lasts between 4-5.5 hours depending on how warm it is in your kitchen. The cooler it is, the longer it'll take, the warmer it is, the faster your dough will ferment on the counter. My starter typically takes 5 hours to ferment.
8:30 PM: Cover your proofing basket with either a plastic bag, shower cap, or large plate that leaves room at the top. Store in the fridge in the coldest part if possible for 12 hours to continue to ferment (for flavour and ease of scoring).
7:30 AM the following day: Preheat your dutch oven (or cast iron pan) in the oven at 500F (260C). Allow to preheat for at least 30 minutes, I liked to preheat for 1 hour (so the cast iron dutch oven fully heats through).
8:30 AM: Pull your dough out of the fridge, and flip onto a piece of parchment paper (use a plate or cutting board underneath to make it easier to flip). Score the top of your dough (confidently!) with a safety blade, a bread lame, or a very sharp knife. Score about 1/2 inch to 3/4 inch deep. Transfer to your preheated cast iron dutch oven, cover with lid and bake for 20 minutes. If you're using a cast iron skillet, mimic the steam for the dutch oven by adding a metal shallow baking dish of water (I'd add about 2-3 cups) on a rack below the bread. Close the oven and bake for 20 minutes.
Then lower the heat to 450F (230 C), and remove the lid of your dutch oven (or CAREFULLY remove the hot tray of water). Continue to bake for another 20 minutes, or until you get a nice, deep brown crust. I like to err on the darker side because it means there's more flavour in the bread. Besides, when you pull it out, it's really not as burnt as it looks with the oven light in there. To know if it's baked through, tap the bottom of the boule and you should get a nice hollow sound. If it's still not hollow-sounding, put it back in to bake another 5 minutes.
After you reached your desired brownness, pull out of the oven and take the bread out to cool directly on a wire rack.
Let cool for at least 2-3 hours before cutting into your bread. If you cut too early, it'll be gummy in texture once it cools, but if you want to eat warm, toasty bread, that's okay too haha. Once cooled completely, store in a bread bag for up to a week. Since there are no preservatives, this bread doesn't usually last longer than a week.