This is the recipe for sourdough bread for beginners that I’ve been using over and over! It’s a medium/large sized loaf and is easy to modify based on the flours you have at home.
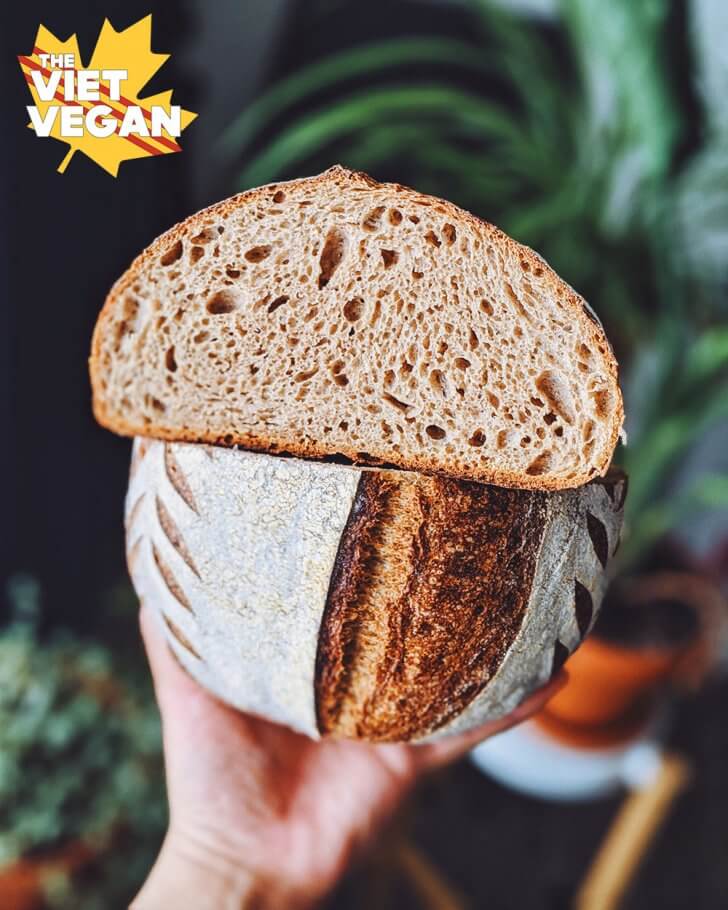
I’ve been lusting after sourdough ever since I first started my food blog. I remember back in 2011, one of the food blogs I used to follow, Pinch My Salt, shared her sourdough starter journey and how she made her starter with pineapple juice. I remember seeing that and being mind-blown that you could capture your own yeast just by mixing, refeeding, and waiting. The whole process also skeeved me out as someone who has accidentally grown many science experiments in my fridge, but after seeing so many people bake sourdough bread with the yeast shortage from the past few months, I got my hands on whole wheat flour and never looked back.
I recently shared my start to finish of baking sourdough bread and I’ve learned a lot about bread-making since then, MOSTLY through trial and error.
A lot of error.
I’ve baked at least 6 pancake loaves, mostly from over-extending myself and getting a little too ambitious with batch mixing dough to make multiple loaves OR batch mixing coloured dough to make marbled loaves.
The bread always tastes good, but I find when I overcomplicate my dough, the results tend to get pretty messy and not as beautiful. I have yet to perfect my marbled dough technique, but I figured I’d nail the regular boule before I tackle marbling again.
This recipe uses the following baking percentages:
- 100% flour (350g)
- 80% hydration (280g)
- 20-21% levain (70-75g)
- 2% salt (8g)
You can lower the hydration to 75% (so 262g water instead) if you aren’t ready to work with a stickier dough. You could even lower it down to 70% before you get the hang of handling the dough. One of the best things to use is a plastic scraper for the bowl, a wet metal bench scraper for folding the dough, and wet hands and surface area to manage your dough. A lot of hand-washing to be done! But in these COVID19 times, that’s not unusual anyway!
Levain vs Mature Starter?
If you don’t have a sourdough starter yet, I have a similarly long-winded post about how I troubleshoot my sourdough starter and how Carter the Starter was born. Good sourdough bread begins with a strong starter. Mine is fed twice a day with a 1:5:5 ratio of food because my starter is ravenous with 1:4:4 still, and it feeds on 50% rye bread. You can also use a starter with all-purpose, or whole wheat, or whatever you like. Each starter has it’s own special eco-system and you can bake bread with the same flours you’ve fed it (it’s actually typically better that way, although I don’t often bake with rye).
I see most recipes using a levain to leaven their sourdough, which is a young sourdough starter at it’s peak in hunger/strength. There are plenty of bakeries and professional bakers who ONLY use mature sourdough to bake with, but I’ve only ever built a levain to make my bread. Maybe one day I’ll experiment with using mature starter, but for now, I can only speak to using a levain.
This recipe builds a separate 1:2:2 levain (so 1 part starter : 2 parts flour : 2 parts water) which is typically ready to use 5-6 hours after feeding, depending on the temperature of your house. This is also based on the fact my starter is accustomed to being fed 1:5:5 twice a day. If you don’t have as strong as a starter, you might have better luck using mature starter for your bread instead. If that’s the case, simply use 20% of the weight of my recipe (so 70-75g) of mature starter in lieu of the levain.
What kind of Flours?
Like with the sourdough starter, you can bake bread with nearly any kind of flour. Typically, better, more nutritious bread has more whole-grains in it, but you do you. There are plenty of recipes that use All-Purpose flour as the base, and the first 20 or so of my loaves were made with organic all-purpose because that’s all I had. The only issue with AP flour is that it is lower in gluten/protein, and thus doesn’t absorb as much water as whole wheat, bread flour, or other kinds of whole grain flours.
That’s why I tend to add gluten flour, or vital wheat gluten (the same stuff used to make seitan), to up the protein of my flours to yield a chewier and stronger bread. It’s not absolutely necessary, and you can probably leave it out and replace it with 20g of whichever flour you like.
In this loaf, I’m using 1847 Bread flour (a local Ontario flour mill), which is a pretty thirsty flour. I’ve got my hydration at 80% (so if my total flour weight is 350g, 80% would mean 280g of water). Normally that is a pretty wet and difficult dough to work with, but since my bread flour is so thirsty, it acts more like a 75% hydration loaf, which is a lot easier to handle. I’ve since baked with an 85% and 88% hydration and both loaves acted more like an 80% hydration loaf. So get to know your flours: flours like rye don’t soak up as much water, but whole wheat and spelt tend to soak up more in my experience. Have fun and play around with different blends. I like keeping the bulk of my flour to be bread flour, and then I play around with the remaining 80g to be either spelt, whole wheat, or a combo of the two. I have been meaning to get my hands on red fife too!
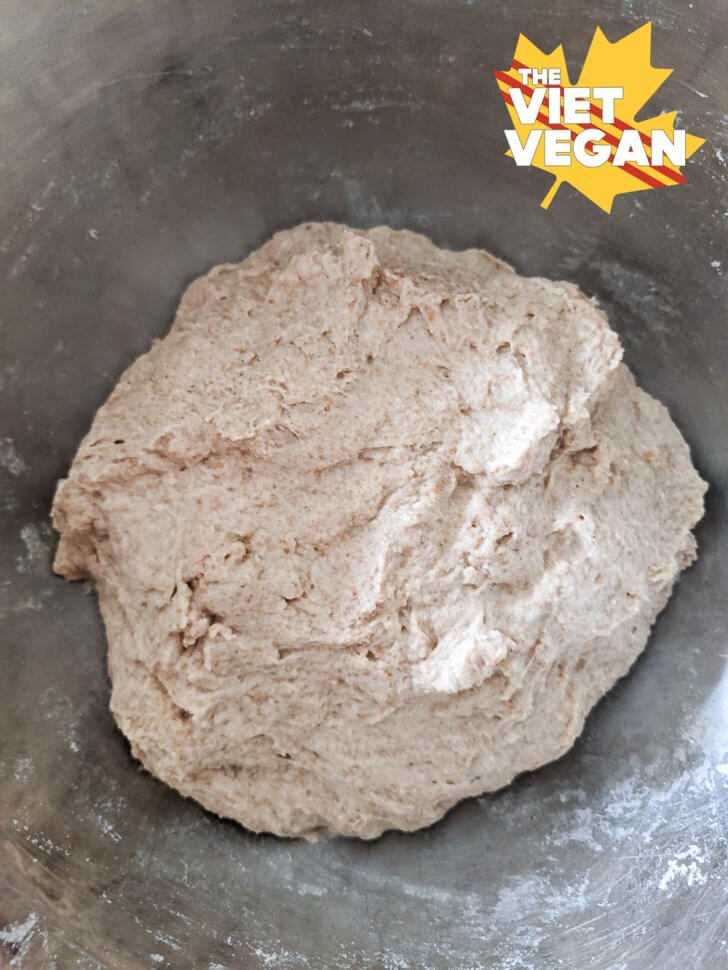
Autolyse
Pictured here is the autolyse process of bread-making: when it comes to sourdough, the texture of your dough and the flavour of your dough come down to gluten-structure and sourdough starter strength. Achieving a well-risen loaf of bread requires a balance of fermentation and gluten strength, which all begins with an autolyse. The term autolysis means “self-digestion” (Greek-derived), which in this case, means the sugars in flour begin to break down once water is added to it.
This sounds bad, but the autolyse process of combining flour and water yields a more elastic dough because it gives the gluten a head start to develop. You could just as easily make bread and skip the autolyse completely, but it’s a technique developed by chemist and expert bread-maker Raymond Cavel (source) and yields a creamier bread crumb that has revolutionized the art of French bread-making.
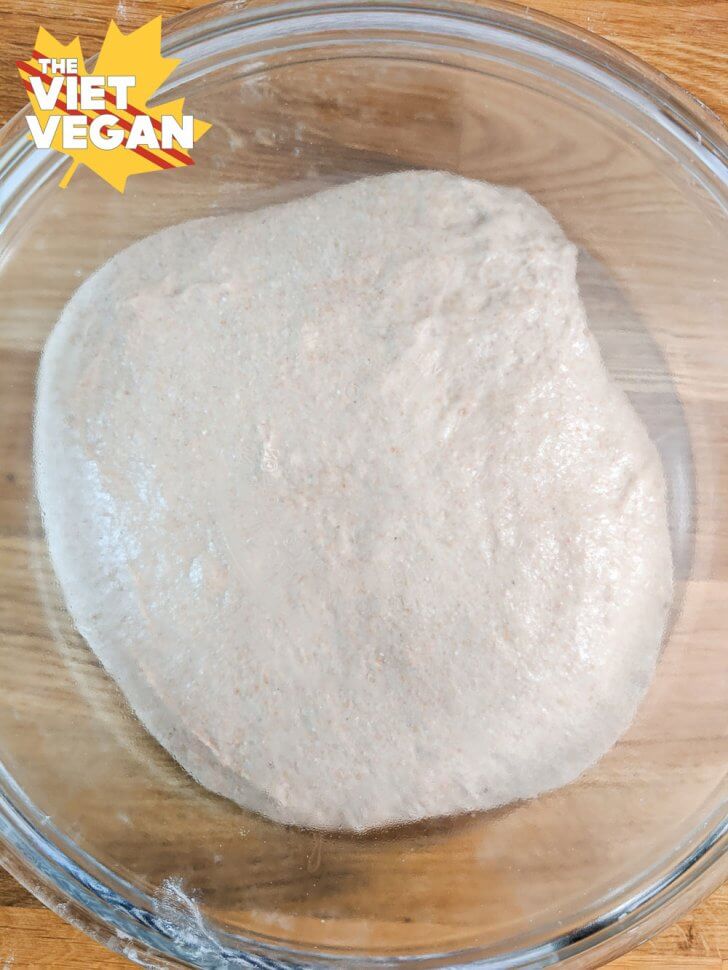
Folding Technique: Strengthening the Gluten
So in the recipe I list two different kinds of folds: stretch & folds or coil folds. From what I can tell, coil folds are common for larger bulk amounts of dough (like if you’re baking 40 loaves at a time or something), but from what I can tell, people use coil folds for smaller batches because it’s a more gentle method of agitating the dough. Stretch and folds are really easy and can be performed in the same bowl you mixed the dough in, and I’ve had great results (as well as bad results) with both methods. Either or works! I find I like coil folds mostly because the dough is kind of neatly organized for shaping by the time you’re done. With my S&F loaves, I’ve had to scrape it out of the bowl a little bit.
The whole point of either folds is to stretch and strengthen the gluten so you’ll have a springy, tender and chewy bread. The better the strength, the better the structure of bread, and you’ll be more likely to have a nice, domed loaf bread versus a flattened pancake of a loaf.
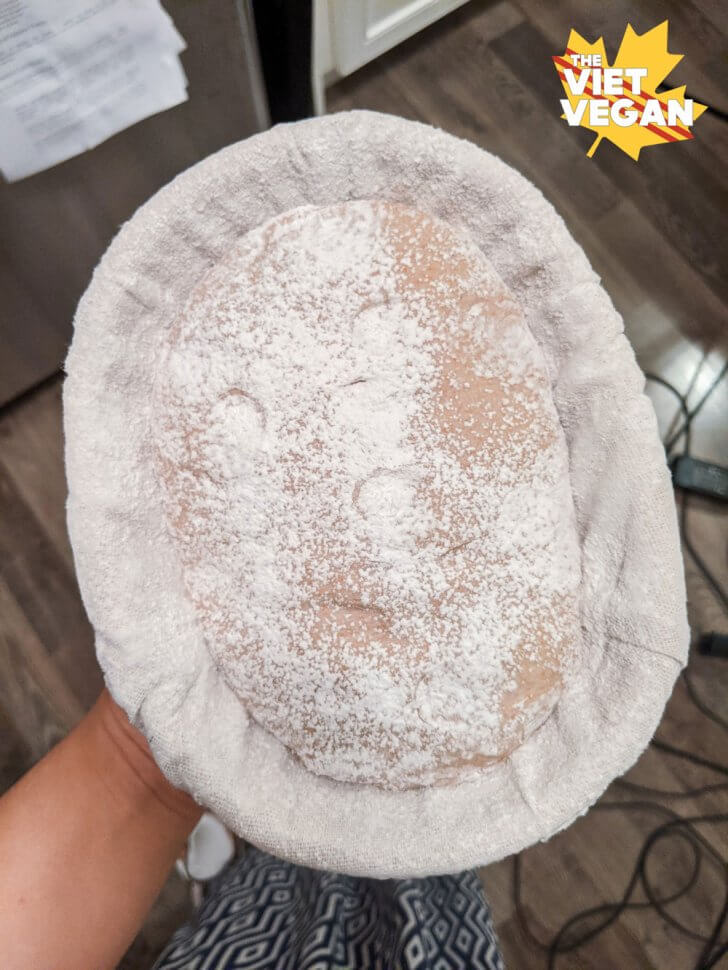
Bulk-fermentation: How to know when it’s Proofed
I think the hardest part about the bread-making process is the proofing: when to know when it’s ready. One of the main ways to know is by recognizing when your dough has increased in volume enough. It should be between 70% bigger or nearly doubled in size, and you’ll notice it almost being a bit jiggly. This can take between 3-6+ hrs of bulk fermentation (bulk fermentation begins when you add levain to your dough, and ends when you put it in the fridge). The reason it ranges so much is based on temperature and elevation. The hotter it is, the faster it’ll proof. The colder it is, the more time you need to give your starter to work its way through the dough.
My main method of knowing if it’s proofed is the poke test: where you poke a well-floured part of the dough to see if it springs back. If it springs back quickly, it still has some proofing left to do. If you poke it and it stays dented, then it’s over-proofed. (If it’s over-proofed, I’d try to do a gently reshape to see if it’ll bounce back, but worst case scenario, just bake it anyway and you’ll have a bit of a pancake loaf, which is ultimately still bread).
If you poke it and it springs back but leaves a bit of a dent, then you’re correctly proofed!
It’s a lot of trial and error, and worst case scenario: whether it’s under-proofed or over-proofed, you’ll just bake and have slightly denser bread. I’ve eaten about half a dozen less-than-ideal loaves and that’s what I love about sourdough. You can still eat your mistakes :D
What do I proof it in?
If you don’t have a banneton (I bought mine from Canada Baking Supplies but it took almost 2 months to get here), you can use a bowl or a colander lined with a lint-free tea towel (like the ones from IKEA). I recommend using rice flour (brown or white) to dust your banneton, because it absorbs moisture in a way that ensures your dough won’t stick to your cloth. My very first loaves stuck to the tea towels and yielded some pretty messed up looking loaves, so learning the rice flour trick from a bunch of you DM’ing me on Instagram was a game changer.
I eventually invested in a banneton (also if you buy one, get the XL or XXL ones because they are deceptively sized and normally quite small), and mine came with some linen cloth liners which were AWESOME. So handy and I can just brush off the extra rice flour instead of caking up tea towel after tea towel and risk damaging our washing machine haha. It’d probably be fine (our washing machine has handled about 20 loaves worth of tea towels so far), but having the dedicated liners has been very helpful. The bannetons help keep the shape better by allowing the bread to breathe while it’s proofing in the fridge, so I’m really glad I invested in these bannetons.
I shape mine in the batard (that’s the long oval) shape because it means the bread is a bit shorter and easier to toast. I’ve also heard that it’s better at yielding an open crumb structure than a boule, but both the boule and batard shapes make delicious bread. Be sure to cover with a plastic bag or a shower cap so it doesn’t dry out completely in the fridge from the open side of the banneton.
Lastly when it comes to proofing: the reason you cold-proof in the fridge is to allow the sourdough to continue developing flavour. When put in the fridge, the yeast slows down in production (so it won’t rise as quickly) but the bacteria continues to munch away at the dough, which means you’ll have a nice, sour loaf. The longest I’ve proofed in the fridge is 14 hours and that was a delightfully sour loaf, but I’ve seen proof proof for 24 or even 48 hours to get a ridiculously sour loaf, which sounds DELICIOUS.
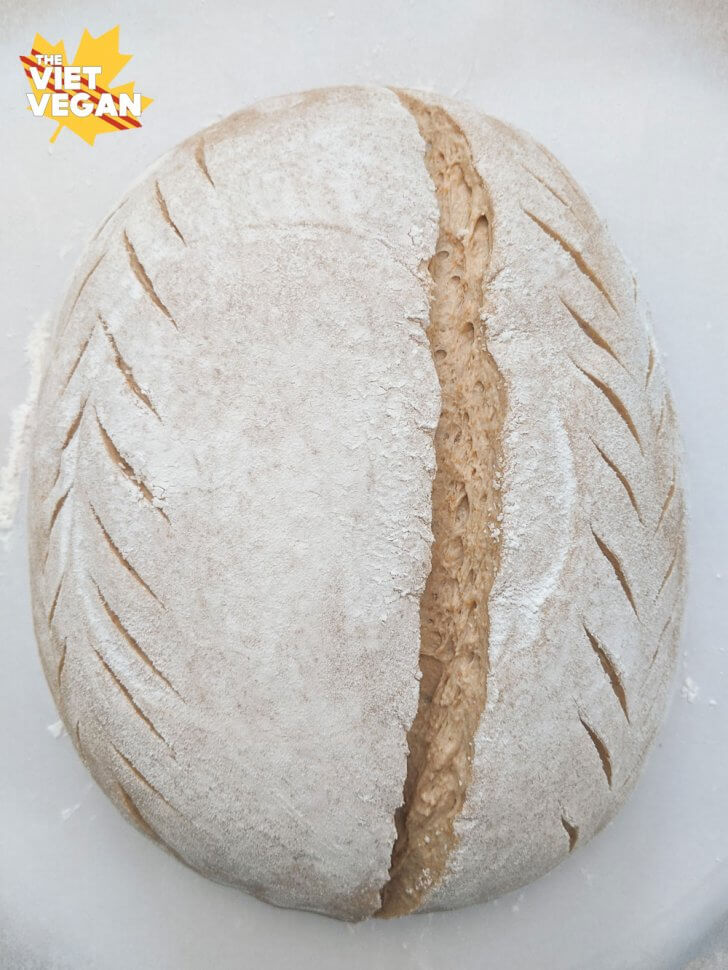
Scoring
My favourite part about baking sourdough is the scoring! I’ve been following r/Sourdough and probably too many bread-makers on Instagram and there are so many people who have such amazing bread scoring ideas! I love the temporary art that is scoring the dough, and how the more confident your cuts are, the cleaner they tend to be. Again, even if you completely mess up your scoring, at the end of the day, you will still have delicious bread to eat.
I will say, that a bread lame is pretty handy. At the very least, purchase some safety blades (they’re ridiculously cheap and available at most pharmacies) and you can carefully hold the safety blade to make your cuts. I’ve invested in a UFO style lame (as you can see in the video below) and there are a lot of people who use the traditional long bread-lame that slightly bends the blade. Either works! If you don’t have either, a sharp knife will also do just fine. All you want to do is give the dough a direction to expand, otherwise it’ll expand out of the bottom and that yields a bread that is slightly more difficult to toast.
Baking Equipment
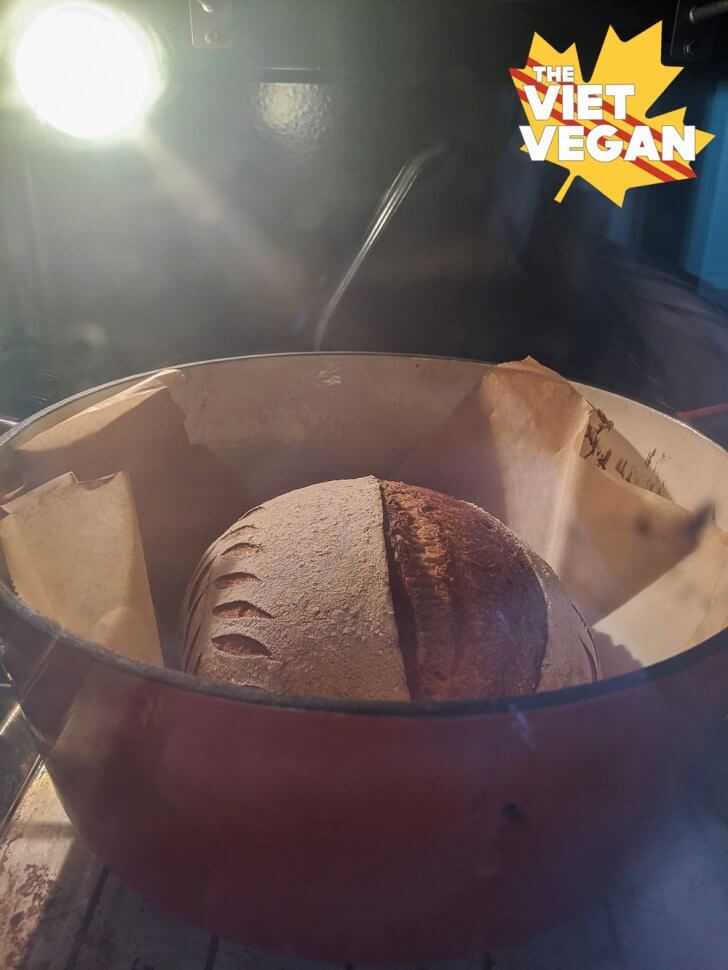
When it comes to baking equipment: I started out baking on my 12 inch cast-iron skillet and used another small pan for ice when I put in the dough. You want to create steam so that the dough is moist enough to allow the insides to expand and break through the score you’ve made. The more steam you have, the bigger the oven spring (how much your dough poofs up). Using a cast iron dutch oven with a lid is probably the simplest way to capture steam from your dough. You can also use a spray bottle or a couple ice cubes to place inside to add more steam, but it’s totally up to you!
I’ve seen people use baking stones or pizza stones, and use a turkey roaster pan overtop to achieve a similar effect, and I’ve also seen people have a tray of lava rocks in the oven. Just before baking, they splash a bunch of water on the pre-heated rocks and close the oven to bake. Kristin from Full Proof Baking has some SUPER satisfying compilations of oven spring videos with that method.
Personally I find the dutch oven the simplest method. I waited until I saw one on sale at Canadian Tire for like 70% off (it was still 180$ in the end) but it’s been so worth it! Plus you can cook with it on the stove, up to 500F in any kind of heat because it’s cast iron. PLUS mine is enameled so it can technically go in the dishwasher, but I’m far too scared of doing that, and I only really bake bread in it anyway so I don’t really wash it ever.
It’s not gross ok, I always bake bread on parchment paper anyway.
My last tip for baking is to remember to lower the heat down to 450F after you get that initial oven spring. The reason you go to 500F in the first place is because you want to get as much activity in the oven spring to lift the dough before it hardens and bakes. Then you lower down to 450F to continue to bake the dough through and the caramelize the crust. With sourdough, you can always go a bit darker than you think. I see a lot of people baking for up to 30 minutes after the oven spring (so 50 min total) to get that really dark, caramelized crust. It doesn’t really burn, it mostly gets a deep, wonderful flavour. If you keep it relatively light, it’ll taste fine but you lose a lot of that Maillard reaction.
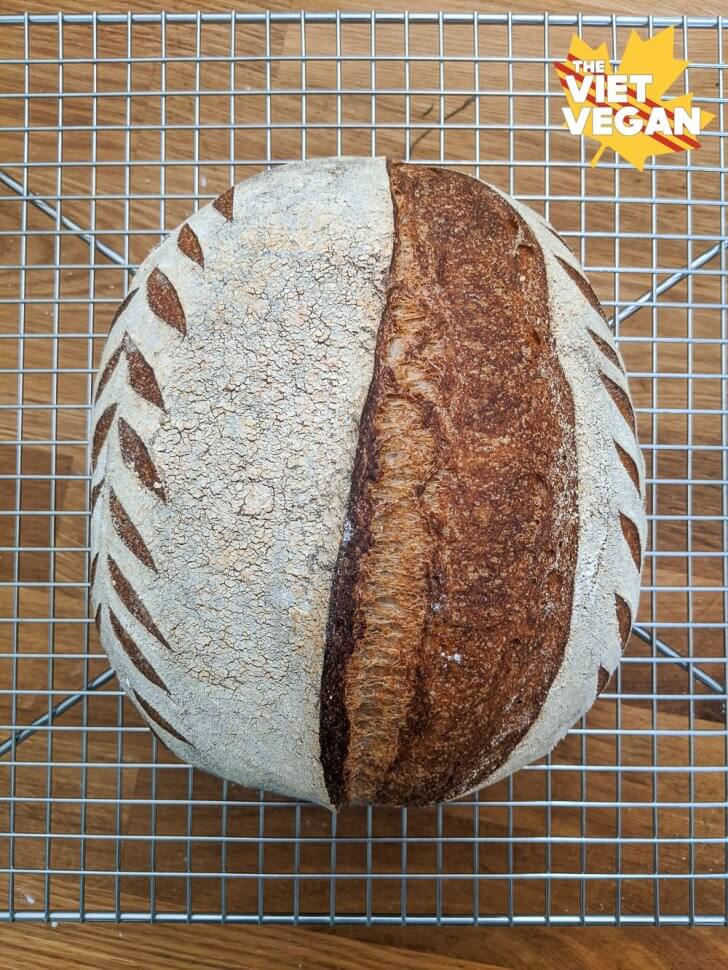
So that’s it! That’s the complete comprehensive post. It’s a little long winded, but this is the aggregation of everything I’ve learned about sourdough so far from my fairy doughmother Liz Miu, watching countless videos on Youtube (Mainly Pro Home Cooks, Proof Bread, Joshua Weissman, Binging with Babish, Full Proof Baking, Food Geek) and reading tons of posts from sourdough enthusiasts on Reddit and Instagram.
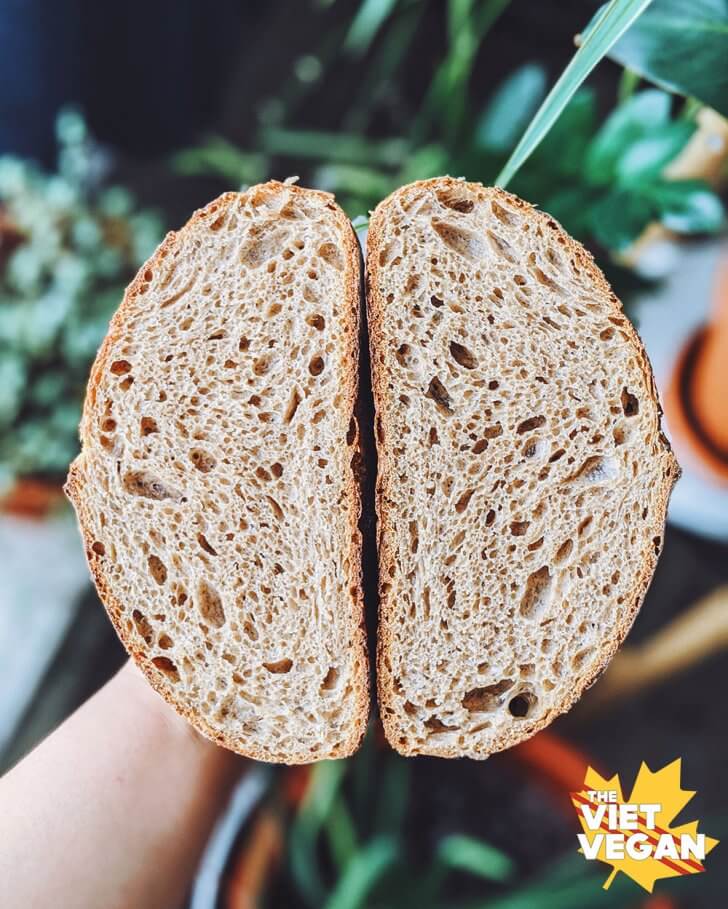
I am by no means an expert, and I still have a lot to learn and practice! Sourdough is a weekly ritual of relearning and practicing for me, and it’s been very meditative, delicious, and of course, very fun. I hope you enjoy this very chill video showing how I made this loaf of bread, and I hope you enjoy experimenting with your sourdough!
Vegan Sourdough Bread For Beginners
Ingredients
Levain:
- 15 g mature starter
- 30 g bread flour I tend to do 20 g bread flour, 10 g my regular starter flour mix
- 30 g water
Autolyse:
- 250 g strong bread flour you can use AP, just hold back 10 g water
- 20 g vital wheat gluten you can sub bread flour for this, but if you're using AP, the added VWG makes your bread much better
- 80 g spelt flour you can substitute whole wheat or rye, or a mix of the 3, as long as it is the same weight
- 280 g water you can hold 20 g, and add as needed in case you aren't experienced with high hydration doughs
- 8 g kosher salt
To bake
- Rice flour for dusting your proofing basket
- A bread lame or a safety blade, or a very sharp knife to score the top
- A large dutch oven lined with parchment paper or a cast iron pan and a baking dish of water
Instructions
- Directions:
9:00 AM - Start your levain by combining mature starter, flour, and water. Combine well, mark with a rubber band/tape and let ferment in a warm place to activate for about 5-6 hours (depending on the strength of your starter). It should be at least doubled and just about to fall by the 6 hr mark.
12:00 PM - Begin autolyse process by combining bread flour, vital wheat gluten, spelt flour/whole wheat. Mix well before adding water to evenly distribute ingredients. Add 260 g water, mix and if you are finding you want to up the hydration, add the remaining 20 g water. You should have a very sticky and rough mixture. Scrape down the sides, cover with a plate and let rest until your levain is ready.
2:30-3 PM: Your levain should be at least doubled in size. Add to your autolysed dough and mix until incorporated, this should take around 3-4 minutes to mix in. It won't seem like it'll incorporate at first but keep mixing until the dough is even and sticky again. Cover and let rest for 30 min.
3:30 PM: Add 8 g kosher salt and knead into the dough until well incorporated. Cover and let rest for another 30 minutes.
4:00 PM: At this point, you'll need to work the gluten gently to encourage strength but also allow for the starter to leaven the dough. You can either perform stretch and folds OR perform a light envelope fold to prepare your dough for coil folds.
To do one set of stretch and folds: With wet hands, scoop your hand under one side of the dough, gently pull it up until just before it looks like it'll resist and tear (about 4-6 inches), then fold it over the center. Turn 90 degrees, and repeat the movement, and repeat this stretch and fold until you've done all 4 sides. Cover and let rest for 45 minutes.
OR
To do coil folds: Prep the dough with an envelope fold - So turn your dough out onto a clean, wet surface. With wet hands, gently pull the top side of the dough slightly up, then forwards to fold over the middle. Pat down gently to "seal". Then grab the right side of the dough, and pull gently up and towards the middle. Repeat with the left side, and then bottom and pull upwards. Use a bench scraper to transfer to a flat, 2 inch deep dish (like a casserole dish or a pyrex dish) then cover and let rest for 30 minutes.
Once it rests for 30 minutes, with wet hands, tuck hands underneath the middle of the dough, and gently pull up from the top. The top of the dough will want to naturally tuck underneath the dough, you may need to tuck and pull another time from the top if the dough is still quite slack. Turn the dish 180 degrees, then repeat this coil fold on the bottom side (which is now the top). Turn 90 degrees, repeat this fold (you may need to rewet your hands so they dont stick). Turn 180 degrees and repeat with the final side. Let rest for 45 minutes.
4:00-7:00 PM: This window of time should be divided into 30-45 min intervals of stretch and folds OR coil folds. Both work fine, coil folds are a little more gentle and may yield a more open crumb structure in the final bake. I generally like to perform at least 3 sets of folds, as long as you let the dough rest for 30 min in between each fold. Then I like to let the dough continue fermenting for a final 45-60 minutes. Your dough should be a little poofier than when you started your stretch and folds (generally between 50-70% bigger). You'll know your dough is ready when after resting 30 minutes from your coil fold, it still keeps most of it's shape (aka it won't have splooted out into a wet puddle like when you started).
8:00 PM: Now you preshape - Lightly flour your surface and flip your dish overtop, allowing the dough to slowly release itself from its vessel. Perform a gentle envelope fold (top, side, side, bottom), then use a bench scraper to flip the dough, seam side down. Gently shape by pushing the bench scraper in a backwards C motion and pull the dough towards you in a C. You'll gently rotate the dough with this motion a few times to create a but of surface tension in the dough. Let rest for 15 minutes.
While your dough rests, prep your proofing container. If you have a banneton, use either brown rice or white rice flour to dust the inside so it won't stick to your dough. If you don't have a banneton, you can use a loaf pan lined with a lint-free tea towel, dusted well with rice flour. Regular flour will not be as effective as rice flour, I highly recommend rice flour. Set aside.
8:15 PM: Use your bench scraper to scoop under the dough and flip onto a lightly floured surface. With lightly floured fingers, gently fold the top over into the middle, and tap lightly to seal. Gently pull the bottom to fold over the folded top. Tap lightly to seal. Turn 90 degrees, then tuck your thumbs into the top 2 inches of the dough, and use the rest of your fingers to tuck and rough the down gently and firmly towards you (kind of like a sleeping bag).
With seams down, close the two short ends by pinching the edges together. Then, use your bench scraper to gently push the dough and tuck the seams underneath to try to create surface tension. Use the bench scraper to scoop the dough into your hands (or flip over), then place the dough into your rice-floured banneton or loaf pan, seams up. You can lightly "stitch" the dough if you find it kind of unraveled (pulling the dough over each other left to right in a zig-zag pattern).
Dust extra rice flour along the edges and partially At this point, if you poke your dough (poke a floured part), it should spring back but leave a slight dent. If it springs back and doesn't leave a dent, let it sit, covered with a plastic bag or clean shower cap (avoid letting it touch the top) for another 15-20 minutes until it springs back. Careful not to let it overproof: when it's overproofed, it doesn't spring back at all and just stays dented if you poke it.
The "bulk ferment" begins when you add your levain and ends when you cover the dough to put in the fridge, and typically lasts between 4-5.5 hours depending on how warm it is in your kitchen. The cooler it is, the longer it'll take, the warmer it is, the faster your dough will ferment on the counter. My starter typically takes 5 hours to ferment.
8:30 PM: Cover your proofing basket with either a plastic bag, shower cap, or large plate that leaves room at the top. Store in the fridge in the coldest part if possible for 12 hours to continue to ferment (for flavour and ease of scoring).
7:30 AM the following day: Preheat your dutch oven (or cast iron pan) in the oven at 500F (260C). Allow to preheat for at least 30 minutes, I liked to preheat for 1 hour (so the cast iron dutch oven fully heats through).
8:30 AM: Pull your dough out of the fridge, and flip onto a piece of parchment paper (use a plate or cutting board underneath to make it easier to flip). Score the top of your dough (confidently!) with a safety blade, a bread lame, or a very sharp knife. Score about 1/2 inch to 3/4 inch deep. Transfer to your preheated cast iron dutch oven, cover with lid and bake for 20 minutes. If you're using a cast iron skillet, mimic the steam for the dutch oven by adding a metal shallow baking dish of water (I'd add about 2-3 cups) on a rack below the bread. Close the oven and bake for 20 minutes.
Then lower the heat to 450F (230 C), and remove the lid of your dutch oven (or CAREFULLY remove the hot tray of water). Continue to bake for another 20 minutes, or until you get a nice, deep brown crust. I like to err on the darker side because it means there's more flavour in the bread. Besides, when you pull it out, it's really not as burnt as it looks with the oven light in there. To know if it's baked through, tap the bottom of the boule and you should get a nice hollow sound. If it's still not hollow-sounding, put it back in to bake another 5 minutes.
After you reached your desired brownness, pull out of the oven and take the bread out to cool directly on a wire rack.
Let cool for at least 2-3 hours before cutting into your bread. If you cut too early, it'll be gummy in texture once it cools, but if you want to eat warm, toasty bread, that's okay too haha. Once cooled completely, store in a bread bag for up to a week. Since there are no preservatives, this bread doesn't usually last longer than a week.


SAMUEL LEVY says
I had little idea about cooking but I never made bread. This takes way longer than I expected. I’m sure it’ll test my patience. LOL. Wish me luck.
Nimit says
Thanks for sharing the recipe for a beginner like me! I’m definitely going to give it a shot.
Shannon says
Thanks for the mention! Shipping was definitely very slow during the height of the pandemic. Things have improved a lot since then. Still a few hiccups here and there but much better.