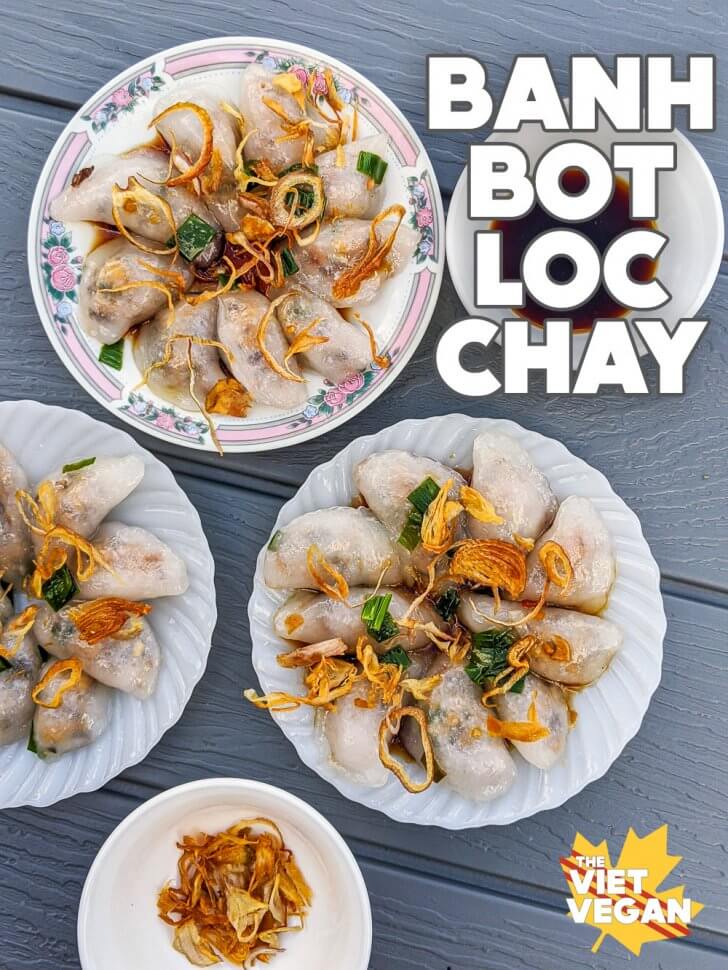
Bánh Bột Lọc Tran Chay is the veganized version of the traditionally chewy tapioca dumplings that originate from Central Vietnam, where my dad’s side is from.
I remember one of the first times I went to Vietnam, I was hit with a wave of culture shock when I visited my dad’s side of the family in Hue (Central Vietnam). To get to my grandparent’s house and my dad’s old village, we had to travel for what felt like two hours (could have been less time, I actually don’t remember) on a little fishing boat across the river. This was back in 1997 before they built the bridge that allowed for motorbikes and cars to travel over. Being 7 years old, sheltered in Canada and growing up with the luxuries of light switches, running water and flushing toilets, I was humbled by where my dad came from and how different life was.
When I last visited my grandparents back in 2009, so much had changed. Running water, electricity, a TV, and most importantly for me, a toilet that flushed. But some things stayed the same: the bamboo leaf hats that were essential for shade, the honks of motorbikes down the road, the neglected house cats that were only around to keep rodents in check, and of course, the local food vendors with tiny plastic chairs and the most delicious foods from the region.
During my visit in 1997, my aunt took my mom and I to one of the street vendors that made Bánh Bột Lọc Lá, similar to these dumplings in this recipe, but each dumpling was bigger and flatter, and wrapped in banana leaf before boiled. My mom untied the banana leaf wrapper and revealed a clear, oily dumpling, with crumbles of ground pork, tiny dried shrimp, and flecks of onion and wood ear fungus peeking through.
My mom splashed some amber nước chấm sauce over the glistening dumplings, and showed me how to eat by using the spoon to gently cut through the dumpling but leave the banana leaf intact on the plate. I followed my mom’s lead and ate my first bite of this wonderfully chewy, savoury and salty dumpling, brightened with the lime in the sauce and enhanced with the umami of fish sauce.
Vietnamese food is delicious no matter which region it’s from, but the food where my dad is from is just on another level of delicious.
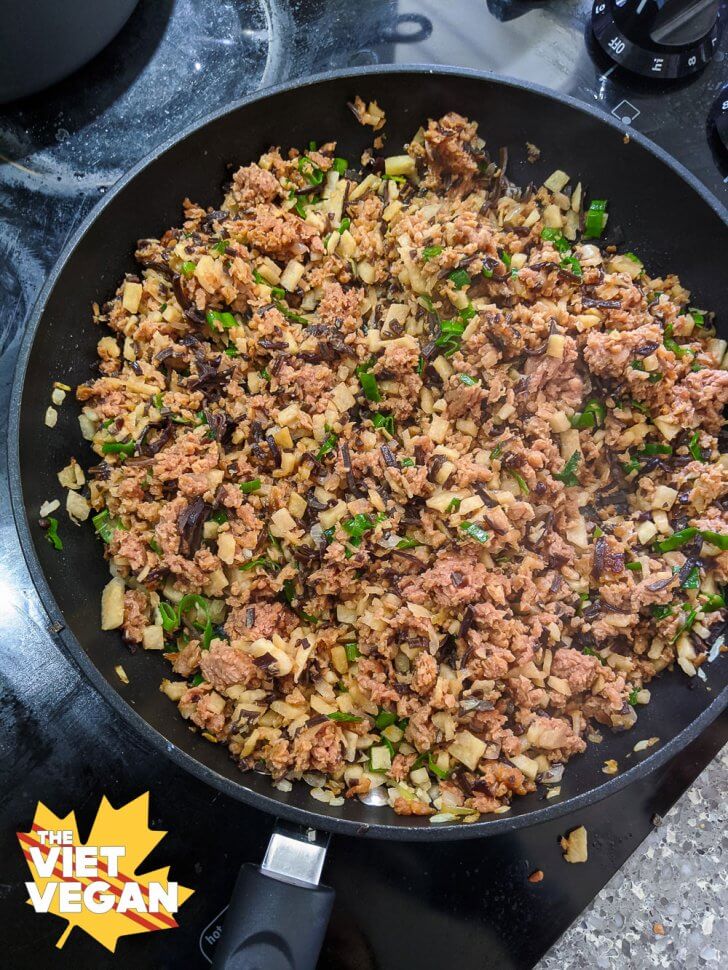
These dumplings are the simpler version of that delicate Bánh Bột Lọc Lá. Bánh Bột Lọc Tran Chay translates to Vegetarian Naked Clear Flour Dumpling. Traditionally, I ate these with ground pork and tiny dried shrimp, but obviously I have swapped vegan substitutes instead. I used Lightlife ground meat here, but you can just as easily use mushrooms, or if you want to keep it protein-y, use cooked and seasoned mung beans (like this banh it tran filling) Yves veggie grounds, Gardein ground, Beyond Beef crumbles, or unseasoned TVP. Heck, you could even use lentils instead.
Personally, I love the nostalgic texture of Lightlife ground in this, I find it to be the closest to pork, and using wood ear mushrooms, you have that familiar squishy crunch that is so nostalgic of so many Vietnamese dishes.
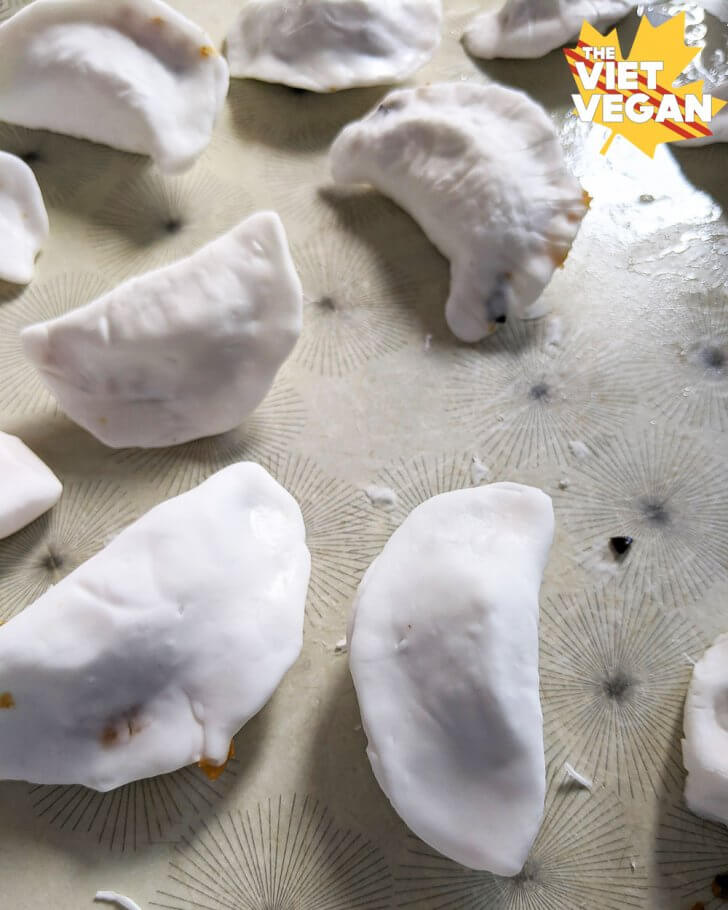
Sorry for the subpar quality photos here, I was kind of rushed because my mom was just snatching these dumplings to cook before I could take a decent photo of them, but this is what the dumplings look like before they get cooked. The dough is purely tapioca starch: when you add boiling water to the starch, it creates this elastic, supple dough that is like an extremely satisfying Play-Doh. Except you can eat this!
Filling the dumplings takes a little practice to understand the balance of rolling out a wrapper that is the right thickness and using the right amount of filling so it doesn’t bust through the wrapper.
It’s tedious work, but with enough helping hands, you can make quick work of this bánh bột lọc Tran chay for such a tasty, savoury snack (or meal!)
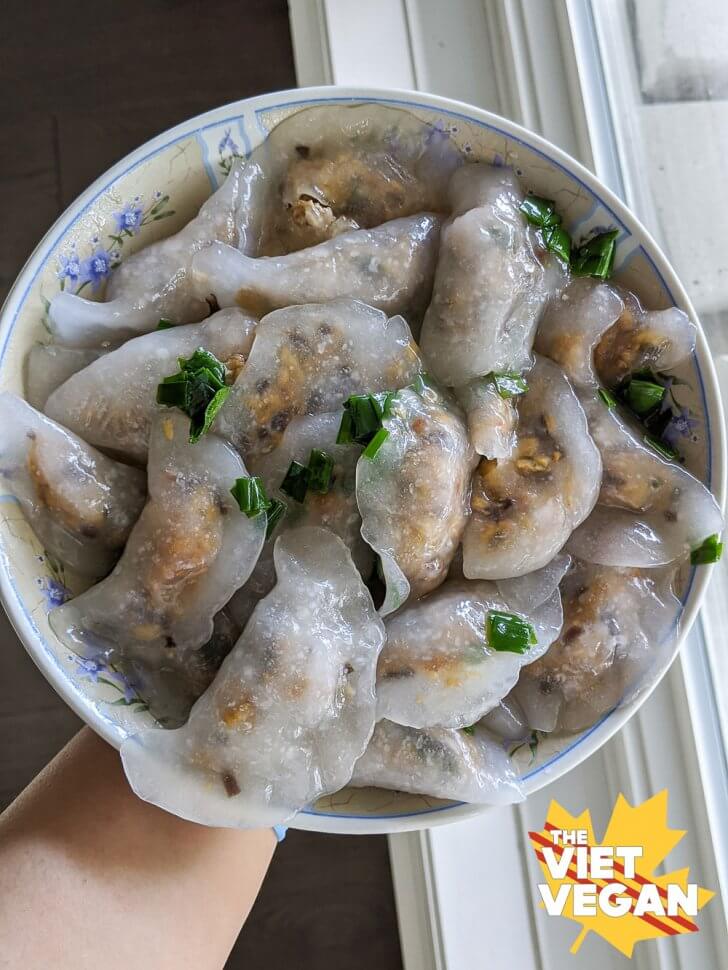
Check out my video of my mom showing me how to make bánh bột lọc tran chay, and the wrapping technique up close before you try your hand at it!
Bánh Bột Lọc Tran Chay - Vegan Vietnamese Clear Dumplings
Ingredients
For the Filling:
- 1 tbsp 15 mL vegetable oil
- 1 medium onion finely diced
- 1 package of Lightlife ground 340 g
- 20 g ~1/2 cup dried wood ear fungus slices, hydrated for 10 minutes
- 1/2 jicama peeled and finely diced (1 heaping cup or ~200 g)
- 1 tsp 5 g sugar
- 1 tbsp 15 mL soy sauce
- 1/4 tsp ground black pepper
- 1 bunch about 6-8 of green onions, finely diced
- Optional: 1/2 tsp salt if you're not using a meat substitute that is already seasoned.
For the green onion oil:
- 1/4 cup 60 mL vegetable oil
- 3-4 green onions finely diced
For the dumpling:
- 800 g tapioca flour/starch If you don't have a scale, we used 2 bags of the tapioca flour from the Asian market, but it's like...6.5 cups..? Weight is much more accurate
- 700 g boiling water you can hold back some and just add until it's the right texture. Do this if you're using cups and not weight
- Oil for your hands ~1/4 cup overall?
To cook:
- 1 medium pot of water filled to at least 2 inches
- 1 tbsp 15 mL oil
- 1 large bowl of tap water I've seen people use specifically ice water but my mom just used cold/cool tap water
To serve:
- Fried shallots or fried onions
- Vegan Nuoc Mam Cham
Instructions
For the Filling:
- In a large pan over medium heat, add 1 tbsp vegetable oil and diced onion, and cook until translucent, about 3 minutes.
- Add the meat substitute (I used Lightlife ground), and use a wooden spoon to break up the "meat" and stir well to cook evenly, about 5-6 minutes.
- Add the rehydrated and chopped wood ear fungus and diced jicama. Stir to incorporate.
- Season with 1 tbsp soy sauce, 1 tsp sugar, and 1/4 tsp black pepper (feel free to up to 1/2 tsp if you like it peppery) Stir until the jicama has heated through and isn't too crunchy.
- Stir in the finely diced green onions, remove from heat, and set aside.
For the green onion oil:
- In a small pot over medium heat, heat the vegetable oil until shimmering. Add in the green onions and stir. Remove from heat and let onions infuse in the oil. Set aside.
For the dumpling:
- In a large mixing bowl, combine tapioca flour and boiling water and either use a stand mixer with a dough hook or a wooden spoon to mix everything together until you get a sticky, shaggy dough.
- Then with oiled hands, turn the dough onto a well oiled surface and knead until no lumps remain in the the dough. Keep applying oil to your hands once you find you start sticking, and knead until you get a nice, smooth, elastic dough.
- Divide the dough in half, then cover one half with a plastic bag or with an upside-down bowl so it doesn't dry out.
- Pull off small, nickle-sized ball of dough (you can do as big as a quarter, but the smaller, the better!), and roll into a ball. Then gently squish to flatten around the edges, and finally even out the middle. You want a circle, around 2-inches in diameter and between 1/8 to 1/4 inch thick. Add about 1 tsp of filling to the centre (or as much as you can manage), then pinch and fold the edge to seal. Try not to fold in too much air into the dumpling. Place the finished dumpling on an oiled surface and repeat until you run out of dough and filling.
To cook:
- Bring a medium pot of water to a boil, and add 1 tbsp of oil. Prepare a water bath (ice, or cool/cold tap water is fine) and arrage beside the pot.
- Add in your dumplings, cooking in about 4 batches, stirring gently with chopsticks or a slotted spoon so they don't stick to each other when you first put them in.
- Once they float to the top and look clear inside, use a slotted spoon or stainless steel spider strainer to scoop out the dumplings, and place in the water bath.
- Add in your next batch of dumplings, and let that cook while you take out the cooked ones from the water bath and transfer to a serving plate. Add 1 tbsp of oil onto the finished dumplings, and use chopsticks to gently stir to coat them in oil so they don't stick together.
- Repeat until all dumplings are cooked!
- To Serve:One plate is usually between 8-12 dumplings, depending on how hungry you are or how big you've made the dumplings! Garnish with fried shallots and a few spoonfuls of vegan nuoc mam cham!



Judee says
These look really good. I think I would love to eat them, but might be a bit too much work to make them. But who knows? . thanks for a the recipe and an interesting and informative post
Xuan says
Hi Lisa! Thanks for sharing, I LOVE banh not loc! I think my parents are from the same area as your dad. We used to have to take the small boat to get to my relatives houses until they built the bridge. My parents always referred to their home as Lang Dua (Coconut Village). Thua Thien Hue, Thon Hai Xa Hai Duong.
Rachael says
I’m really thinking about taking the time to make these. All your other recipes have worked out so well for me. I’m really proud now of the way I can make Asian food thanks to you, and I love how much of your stuff is also gluten free.
Lisa says
My name us also Lisa and my mom is Vietnamese! I’m so glad that I found your blog. I made these last night and had to quit making the dumplings after hour 1. It’s a lot of work! But they were delicious. If the dough kept overnight, I’ll try to wrap the rest of the filling today. Or I may just make a vermicelli bowl with it! Thank you for sharing!
Lisa Le says
It definitely helps to have more hands to help haha. I think as you get more experienced you get faster but it’s definitely tedious XD
D says
My grandma was also from Hue and she would spend all day mixing the dough. I’ve been seeing lots of photos of this dish recently, which made me miss her, and am so looking forward to trying your recipe. I just tried Lightlife ground and like it better than Beyond!
Lisa Le says
I’m so happy you are able to reconnect with your grandma with food! I hope you like these! I think I prefer Lightlife ground in these too :)
Huong Helen Chau-Cook says
I hope to try this recipe soon. Thanks for posing it.
W. Dunsie-Love says
Hi. I feel really stupid but what am I doing with the onion oil? Is the green onion oil what we’re supposed to use every time it says “oil” in the recipe?
Love your site and sorry if I’m missing something here. I’ve re-read the recipe 4x so maybe I’m just blind!
W. Dunsie-Love says
PS: OK, I watched the video and see the onion oil is applied at the end. Maybe it needs to be inserted into the “to serve” part of the recipe. Can’t wait to try these. Wish you and your mom were making them for me, yours looked delicious! ;)