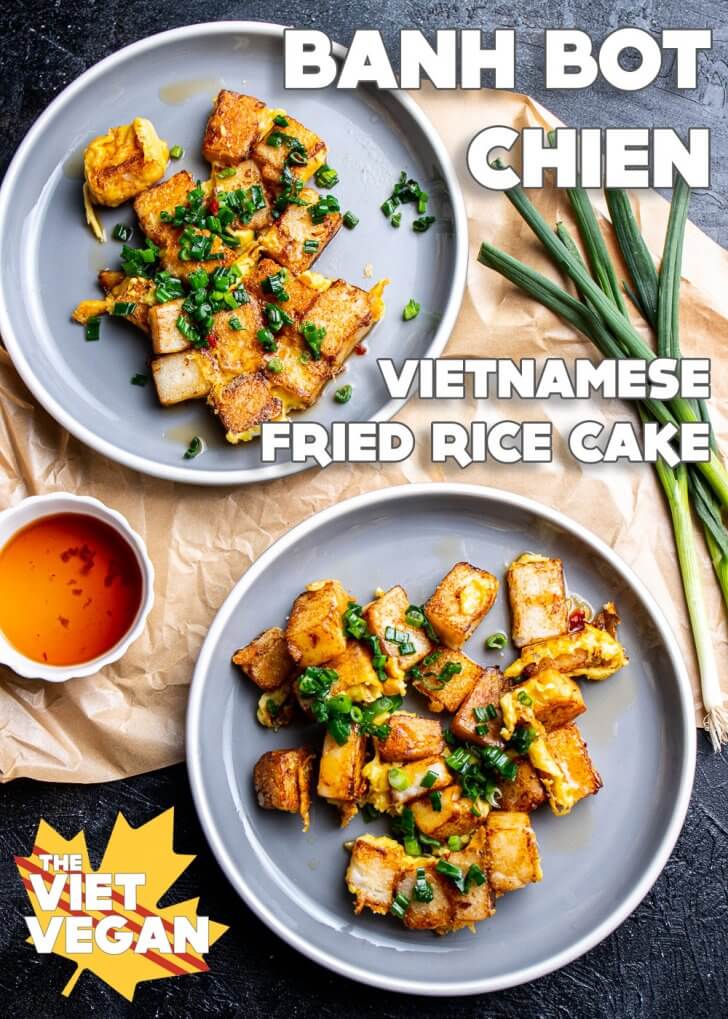
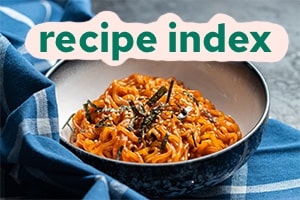
Bánh bột chiên chay (translated to English as Vegan Vietnamese Fried Rice Cake) is a super delicious street food in Vietnam that I ate a lot for breakfast growing up. It’s typically super oily, super savoury, and full of fun texture.
I’ve been wanting to share this Bánh bột chiên chay recipe for a very long time, but it’s been a bit intimidating for me for a while. My family is notorious for cooking without a recipe: they simply cook based on feeling and texture and while I can do that sometimes and get delicious results, it’s often not as consistent as my grandmother or mother does it. I don’t really know how they manage to do it so well, but I guess I still have a lot to learn!
There are actually a lot of pre-measured packets of this mixture at the grocery store, mostly just telling you to add water and oil, but in case you prefer to measure it out yourself or don’t have access to the pre-measured mixes, this recipe is for you! My grandma uses a recipe that has significantly less tapioca starch in it, but I find that the tapioca adds a really lovely bounciness to the steamed rice cake that yields a really tasty texture that isn’t quite as starchy.
There are a few recipes I see online that have different methods that I find a little tedious. Some say to sift the flours together, some say to add 2/3 of the water as cold, then the final 1/3 water as boiling hot. I’ve seen some recipes that tell you to microwave it and stir in intervals to cook the mixture through, but I’ve made this as lazy as possible from my experience of watching my family cook this (granted, it’s been a while since I saw the whole process start to finish).
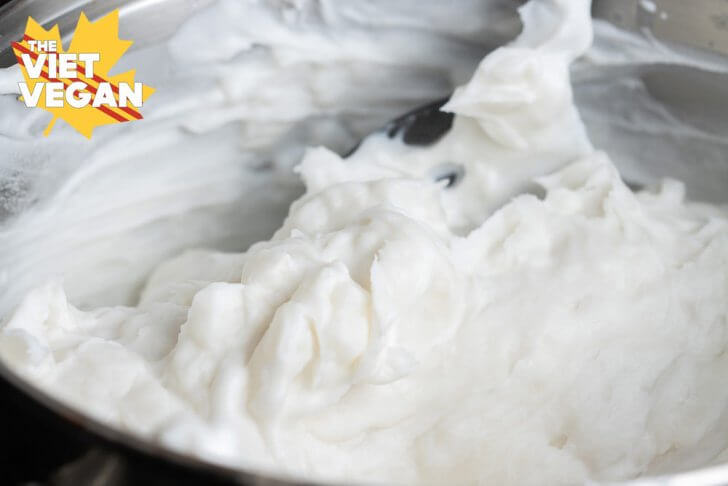
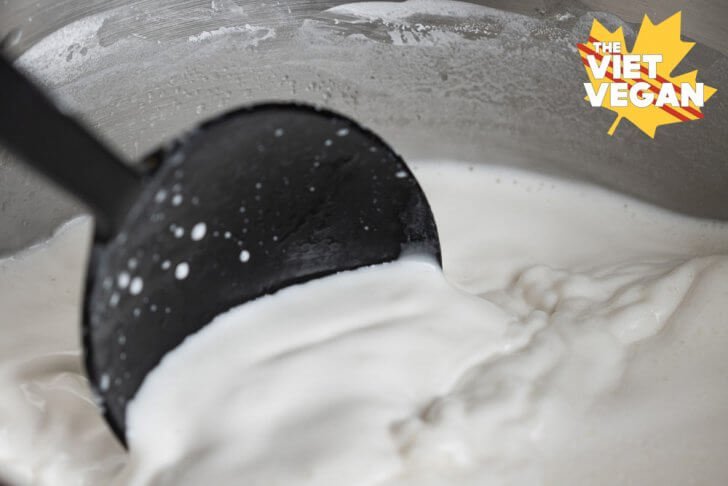
Since testing it in my bột chiên chay YouTube video, I’ve just mixed everything directly into the pot, using a whisk to make sure everything is totally incorporated. Then switching to a silicone spoon, you have to stir it over the heat until it thickens. You want it to be a thick, pancake batter, but not so thick that it’s “glompy”. You want thick and gloopy, but not glompy. Does that make sense..?
In any case, I found steaming to be the most hassle-free way to cook this (none of this microwave nonsense, not that I have anything against microwaves, this just seems really cumbersome). Steaming it for 45 minutes cooks the cake through and then you simple cover and refrigerate this until the next morning, when you can fry it up for breakfast!
Now I don’t know if this is still something people eat for breakfast, I assume it is, but I remember on the weekends when I didn’t have to wake up super early for school (I went to school in Vietnam for like a month when I was 7), I would ride on the motorbikes with my grandpa and my mom to a street vendor, and we’d sit on those super sketchy plastic chairs about a foot off the ground and eat a very oily plate of this delicious, savoury concoction.
Bánh bột chiên typically uses a lot of oil to fry up these little golden cubes, then is bound with 1-2 eggs and topped with green onions and a dash of a specific soy sauce. The soy sauce I would see a lot was mostly a soy + sugar + water mixture, but I always have my nuoc mam cham chay recipe in my fridge so I tend to prefer using this is a tastier and (funkier) version of that sauce.
Eating bột chiên chay always kind of brings me back to the sounds of motorbikes honking and whizzing by, and using these little appetizer picks to spear tender chunks of egg stuck to these crispy and chewy squares. I’m so thankful that we have vegan options for eggs that yield such a nostalgic and similar texture. I hope you try out this recipe and enjoy this veganized Vietnamese street food!

Bánh bột chiên chay - Vegan Vietnamese Fried Rice Cake
Ingredients
For the Rice Cake
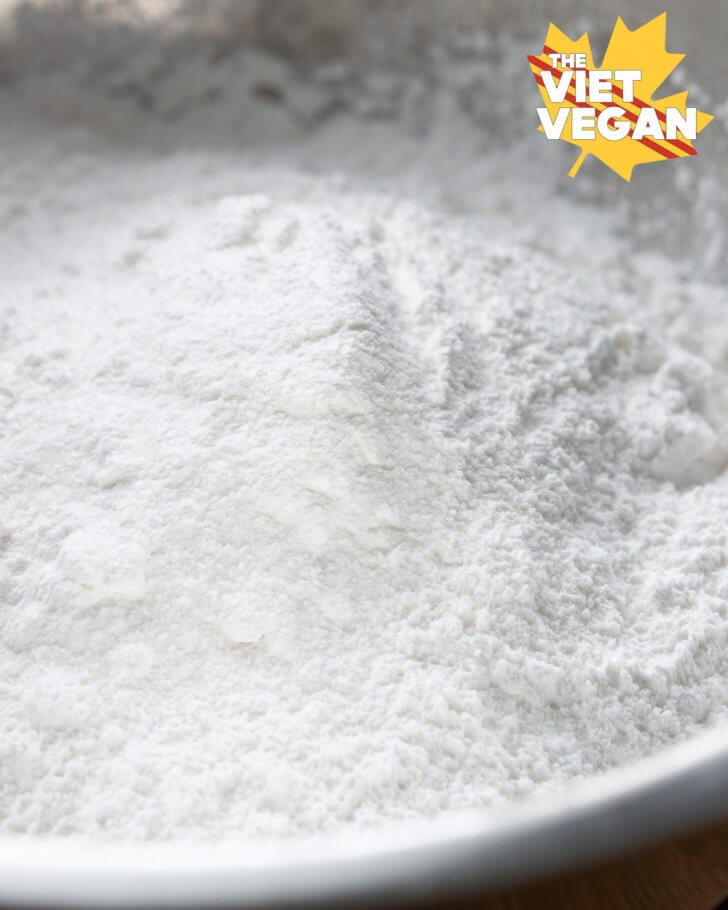
- 4 cups 400 g rice flour (NOT glutinous, just regular rice flour)
- 1 cup 130 g tapioca flour (also known as tapioca starch)
- 1 tsp 5 g kosher salt
- 6 cups 1.5 L water
- 2 tsp 10 mL + 1 tbsp (15 mL) neutral flavoured oil
To prepare (this is per serving of the rice cake)***
- 2 tsp 10 mL dark soy sauce(light soy sauce is fine but it's a little too salty)
- 1 tbsp 15 mL neutral flavoured oil for the pan + 1 tsp (for green onions)
- 2 Vegan eggs ~1/4 cup/60 mL I used Just Egg, but you can also use FYH vegan egg or simply use your favourite tofu scramble
- 2 green onions finely diced
- 1/4 cup Vegan nuoc mam cham
Instructions
- For the rice cake
- In a large pot, combine rice flour, tapioca flour, kosher salt, water, and 2 tsp oil. Whisk very well until everything is completely combined.
- Over medium heat, use a spatula or a large silicone spoon to stir the mixture while cooking, being sure to scrape the bottom of the pot the entire time so no batter sticks and burns to the bottom. Once you start to see some of the mixture clumping up at the bottom, lower to medium-low heat and continue cooking until the entire mixture has thickened, with some clumps. It'll be a very thick pancake batter texture. If there are a few larger lumps, not the end of the world. This should take between 5-15 minutes, depending on your stove. Remove from heat.
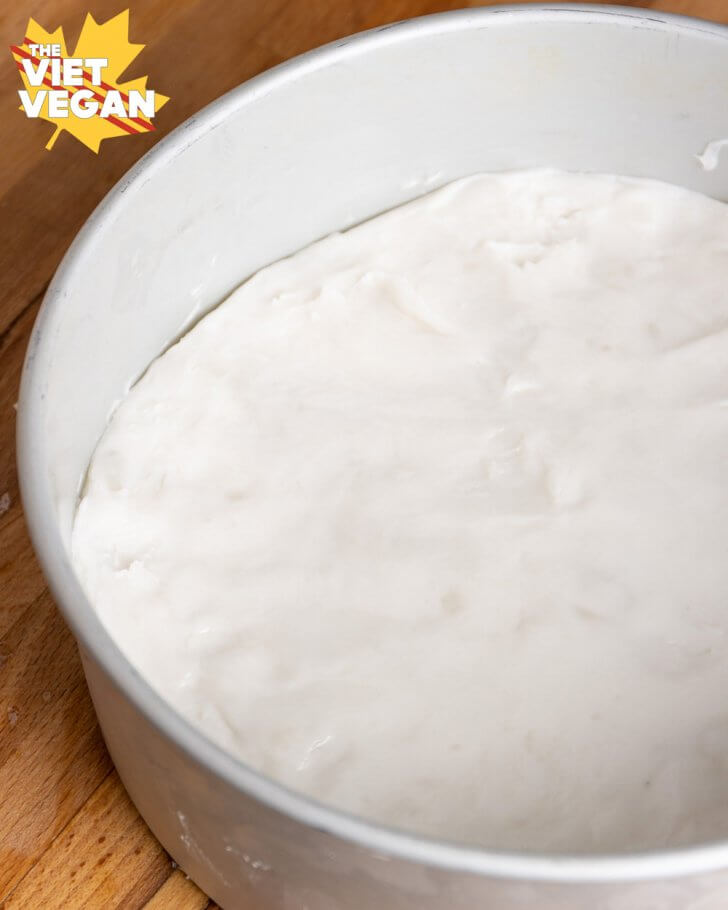
- Prepare a baking pan to be steamed (be sure it fits inside your pot for it to actually steam) by oiling it with 1 tbsp of neutral oil. Be sure to get some on the sides and in the middle of the pan. I used an 8 inch round baking pan with 2 inch sides.
- Transfer the cooked rice batter mixture to the baking pan and either oil your hands or use a well-oiled spatula to flatten the rice cake into the baking pan as evenly as possible.
- Steam (covered) for 45-50 minutes on medium heat to cook the batter.
- Remove from heat and let cool. For best results, store in the fridge by coating the rice cake in a bit of more oil if it doesn't already feel oily to you. Wrap well in plastic wrap or an airtight silicone bag, this will prevent it from drying out in the fridge.
- To prepare (per 1 serving)
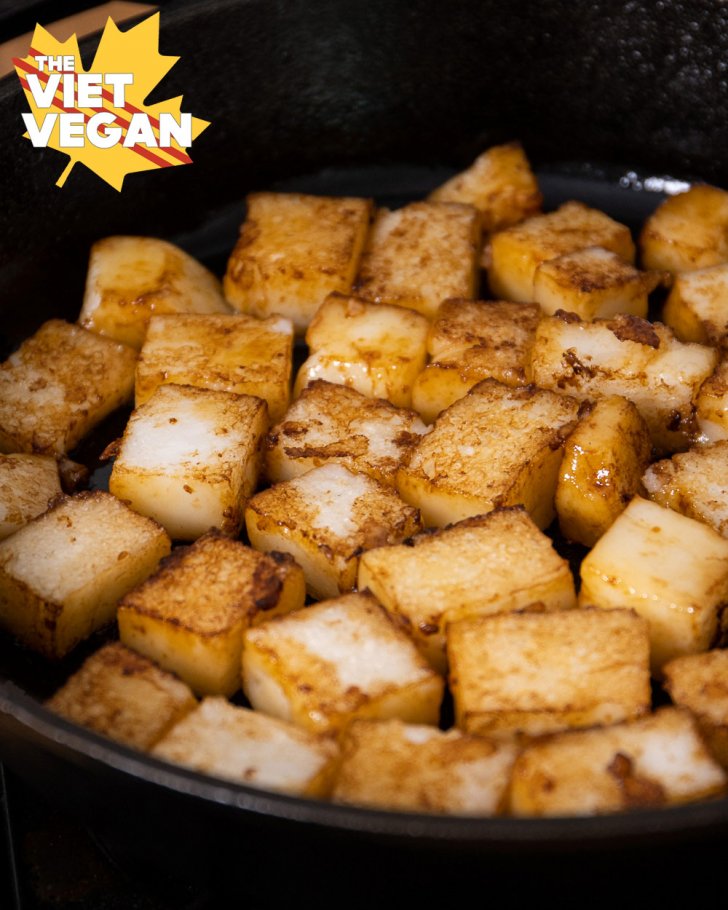
- Slice the rice cake into quarters, and then cut them into rectangles, about 1/2 inch (1 cm) thin and maybe 1x1 inch (2.5x2.5 cm) big. Each quarter of the rice cake is a pretty generous serving. Transfer them to a bowl and drizzle 2 tsp of dark soy sauce on top. Toss until everything is lightly coated in the dark soy sauce, this is mainly for colour.
- In a well seasoned cast iron pan (or a non-stick pan), add 1 tbsp oil and fry the seasoned rice cake, cooking until each side is browned and crispy before turning. It's tedious but the end texture is very worth it. Street vendors will fry in a lot more oil and spoon the hot oil over the rice cake too cook all sides, but I don't have the bravery to handle that much hot oil haha.
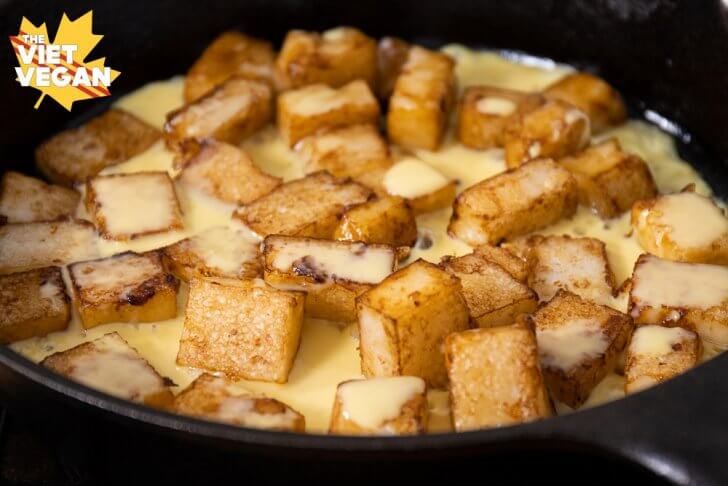
- Once the sides are adequately crisp, pour about 2 eggs worth of whatever vegan egg substitute you're using (I prefer JustEgg for this purpose). Rotate the pan to spread out the egg mixture. Flip once the bottoms of the egg are cooked, you can flip in sections, then once the egg is adequately cooked through, transfer to a plate.
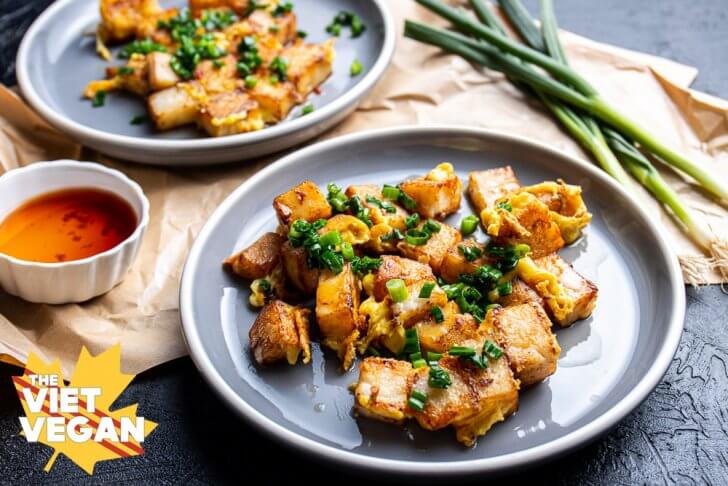
- Cook the green onions in the same pan with a tsp or so of oil, cook until the onions are bright green (about a minute), then spoon over the cooked rice cake.
- Serve with the Vegan nuoc mam cham and enjoy!
Notes
don't really know anyone with a large enough cooking surface to cook
the whole lot aside from proper street vendors

Kristie says
Why doesn’t anyone serve this in any vietnamese restaurants???? Can’t find this great dish anywhere??
The ONLY vietnamese restaurant that serves this dish is Tung Kee Noodle. A great restaurant!!! There are a bunch of Tung Kee restaurants throughout california.
But, why, not at other vietnamese restaurants?? I LOVE this dish!! So yummy!!
Martin Flint says
I want to try this great sounding recipe but I would like to use brown rice flour that I make in my Vitamix. Would this be okay?
Lisa Le says
It would need to be extremely finely milled. The bran from the brown rice might make the texture a bit gritty, but it would technically work fine.
Elly says
you may not know but eggs are not vegan. This dish more like vegetarian than vegan
Lisa Le says
I used vegan eggs (as mentioned in the recipe), it’s JUST Egg, a mung-bean based scramble mixture.
Joe Tornetta says
How long will the rice cake last in the refrigerator? Made it and the final results were delicious. But I have a lot of rice cake left. Thanks
Lisa Le says
Hmmm honestly I just eat until its either dry or moldy LOL. Maybe maximum a week?